
Configure UniFi
Once you've built a portal in Atrium, the only UniFi-side step left is pointing the guest network's landing page at it. UniFi then hands every guest off to Atrium instead of showing its own built-in hotspot page.
Menu names vary by UniFi Network version
This guide matches the current UniFi Network app (guest hotspot settings live under a WiFi network's Application: Hotspot, then Clients → Hotspot → Landing Page). Older versions expose the same setting under Client Devices → Hotspot → Landing Page instead - it's the same underlying setting either way.
1. Set the network to Hotspot
Log in to your UniFi Network web interface. Open (or create) the WiFi network guests will connect to, and set:
- Application: Hotspot
- Hotspot Type: Captive Portal
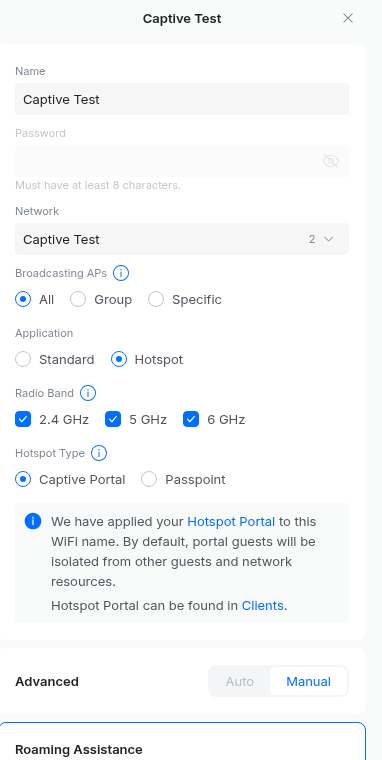
Saving shows a note that your Hotspot Portal has been applied to this WiFi name, with a link into Clients → Hotspot to configure it further - that's where the next step happens.
2. Set the External Portal Server
In Clients → Hotspot → Landing Page, under One Way Methods, enable External Portal Server, click Edit, and enter your Atrium server's IP address. This field only accepts an IP - if you want guests redirected via a domain instead, that's the separate Domain setting below, not this one.
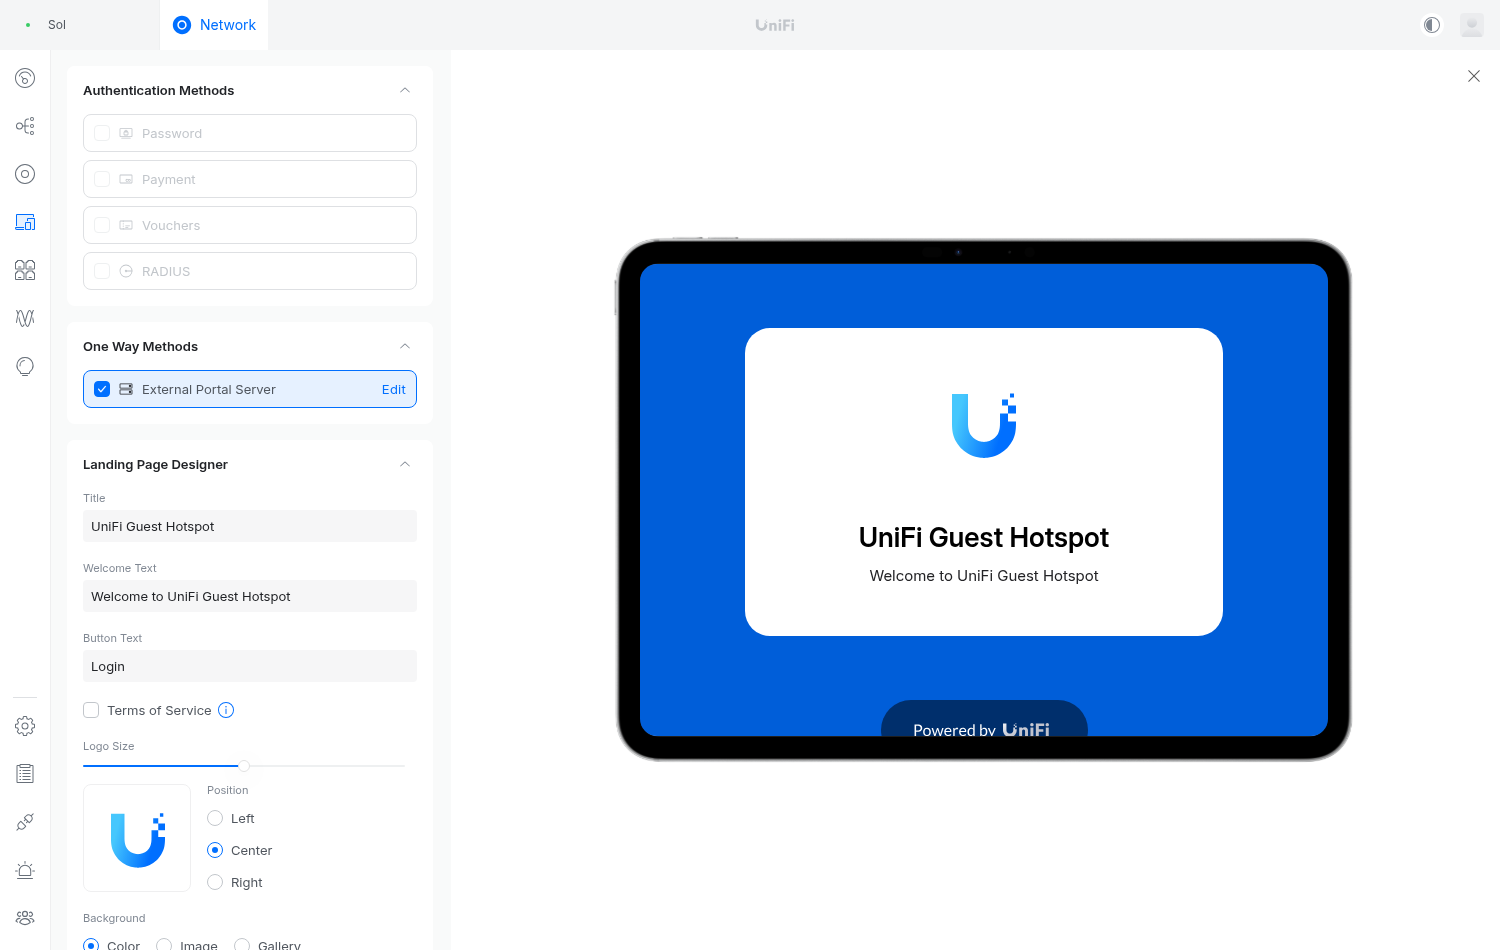
Save.
3. Landing Page Settings and Authorization Access
A little further down the same page are two more sections worth setting deliberately rather than leaving on their defaults:
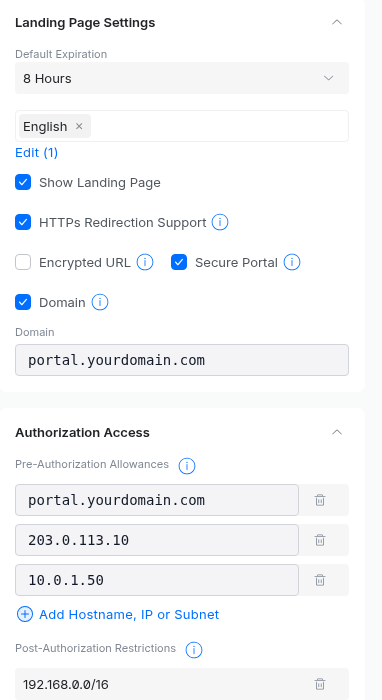
Landing Page Settings:
- Default Expiration - how long UniFi keeps a guest authorized before requiring them to reconnect through the portal again. This is independent of anything in Atrium (which has its own per-portal session settings) - 8 hours is a reasonable default for most guest networks.
- Show Landing Page, HTTPS Redirection Support, Encrypted URL - leave these matched to how your Atrium install is actually served (plain HTTP vs behind TLS).
- Secure Portal and Domain - if you want guests redirected to a domain name rather than the raw IP you set above, enable Domain and enter it here.
Authorization Access → Pre-Authorization Allowances: this is the walled garden - hosts a guest can reach before UniFi grants them network access. At minimum, add the same IP you set as the External Portal Server above - without it, guests can't even load the redirect to your portal. Add your domain here too if you configured one, and anything else the portal itself needs to reach on the way in (e.g. Google's domains if Google Sign-In is enabled on the portal).
Post-Authorization Restrictions, just below it, is the opposite: subnets guests are blocked from reaching even after they're authorized - useful for keeping guests off your private network ranges.
4. Confirm it
Connect a device to the guest network. It should land on your Atrium portal, not UniFi's default hotspot page. If it doesn't, double-check the IP/domain you entered is actually reachable from the guest VLAN - if Atrium sits behind a firewall or on a different subnet, you may need a firewall rule or port forward allowing that traffic through.